ILLAWARRA BROMELIAD SOCIETY Inc.
Club News.
Click HERE to return to Illawarra Bromeliad Society "Club News Page".
NEWSLINK
April 2008
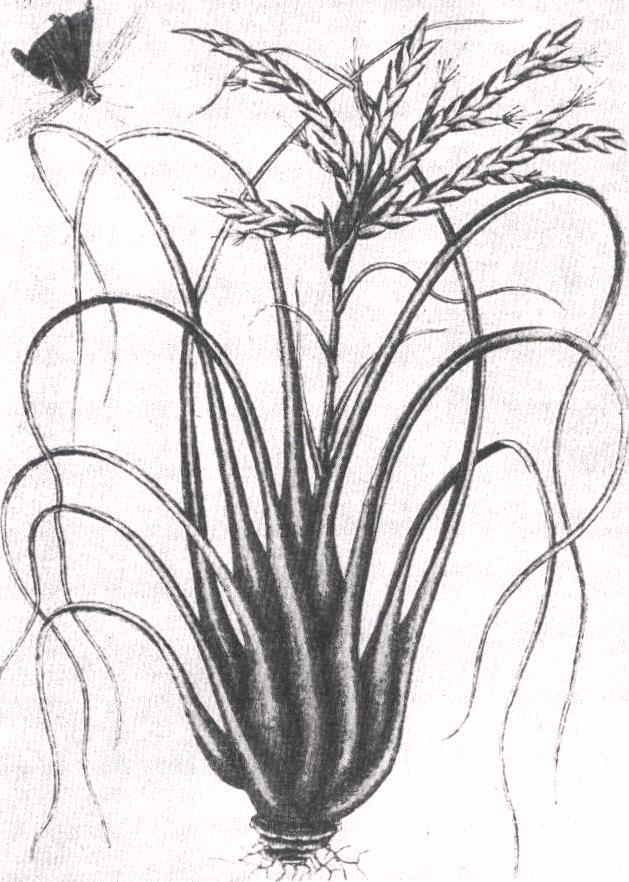
Tillandsia fasciculata. A reproduction of the first drawing of a Florida bromeliad by Mark Catesby and published in 1730 as Viscum caryophylloides augustifolium in “The Natural History of Carolina, Florida and the Bahamas”. [From Plant Life, a publication of The American Plant Life Society, Volume 1, Numbers 2 & 3, July & October, 1945.]
- Articles appearing in this issue of NEWSLINK are for information purposes only and are not necessarily endorsed by the Committee or the Illawarra Bromeliad Society.
- The Society is, by the holding of meetings, displays and competitions, to provide a forum for the people of the Illawarra region who are interested in the culture and collection of bromeliads.
VALE - MARTIN PITT
It is with sadness that we advise the passing of Martin Pitt who died on Monday, March 3, after a long battle with cancer.
While Martin kept rather a low profile at our meetings, just enjoying the company and the plants, he was very active with public service affairs in the Illawarra, particularly his beloved home town of Port Kembla.
In 1993 he had been awarded an OAM for his work in the Electrical Trades Union and was highly respected in both State and Federal political circles.
Martin had been a member of our Society since October 2004, and had also been very active in the Wollongong Cactus and Succulent Society. We will miss him. |
MONTHLY RAFFLE PRIZE ROSTER:
We will again use the roster system for providing prizes for our monthly raffles, and as we’ve had a wonderful influx of new members (21) this past year, we have been able to roster four to five members each month for supplying these prizes. The same rules will apply: if you are unable to supply a bromeliad then items such as potted herbs, cuttings, spare fruits/vegetables from your garden, gardening tools, etc. are acceptable. Also, if you are unable to attend the meeting — and/or are unable to supply a raffle prize when rostered — it would be appreciated if you would either ‘work a swap’ or speak to Elizabeth about getting a fill-in for your month.
As our membership fees are kept very low, we rely on these raffles to help defray the costs involved in the running of our Society, and so your support is very necessary, and very much appreciated.
| April | Paul Godin/Barry Kill/Dick Jamieson/Meri Stefanidakis/Jarka Rehak |
| May | Jan Stammers/Fred Burrows/Eric Jordan/Jenny Taylor/Eileen K |
| June | Loreen Whiddett/Carolyn Buxton/Colette/Graham Bevan |
| July | Valda Beckett/Catherine Wainwright/Neville/Eunice Spark/Beth C |
| August | Christine Okoniowski/June Smith/Glenise Weston/Brian Baldwin/Phillip |
| September | Peter Netting/Sandra Southwell/Ailsa McD/Pat McIntyre/Tom Cross |
| October | Carmel Glanville/Jenny McKenzie/Sharyn/Dawn Climent/Muriel Baldwin |
| November | Alan Kirkby/Bruce Cluff/Dot Stephenson/Laurie Dorfer/Carol Carthew |
WORKSHOP:
Our next workshop will be held on July 19, a Saturday, to accommodate members who are unable to come during the week. This time it will deal with the preparation of plants for Show, and it is hoped that by ‘taking the scare out of’ what might be required for entering a plant into competition, we can entice newer members to enter into the Novice Section at our September Show. Again it will be held at Sharyn Baraldi’s home at 25 Antrim Avenue, Warilla (Phone: 4296 2166) from 10.00 am until 2.00 pm and anyone interested is invited to attend. Bring your lunch; tea and coffee will be supplied.
COMING EVENTS:
| April 19-20 |
BROM.SOC.NSW, AUTUMN SHOW 9-11 Wellbank St Concord |
| April 19-20 |
AUTUMN ON FARM PLANT SALE & NATIVE GARDEN, 140 Russell Lne Oakdale 10-4pm |
| April 26-27 |
Sunshine Coast Spectacular |
| May 3-4 |
Brom.Soc.Australia AUTUMN SHOW Burwood RSL Email: Ian@bromeliad.org.au |
| May 9 |
Mad Hatter's Tea Party & Guided Walk, Wollongong Botanis Garden. |
| June 24 - 30 |
‘BROMELIADS DOWNUNDER’ - The 18th World Bromeliad Conference, CAIRNS, QLD. www.bromeliadsdownunder.com |
| July 27 |
HILLS DISTRICT ORCHIDS OPEN DAY. 183 Windsor Rd Northmead, Email: davidpbanks@veritel.com.au or (02) 9674-4720 |
| Aug 29-31 |
ABC GARDENING EXPO Homebush |
| Sept 11-14 |
CENTRAL COAST BROM.SOC. SPRING SHOW Flora Festival Kariong |
| Sept 13-14 |
ILLAWARRA BROM.SOC. SPRING SHOW Uniting Church Russell St Corrimal 9-4 |
| Oct 4-12 |
LEURA GARDENS FESTIVAL, www.leuragardensfestival.com.au |
| Oct 11-12 |
BROMELIAD SOCIETY OF AUSTRALIA - SPRING SHOW Burwood RSL Email: Ian@bromeliad.org.au |
| Oct 12 |
HILLS DISTRICT ORCHIDS OPEN DAY. 183 Windsor Rd Northmead, Email: davidpbanks@veritel.com.au or (02) 9674-4720 |
| Oct 14-16 |
HUNTER VALLEY GARDENS TOUR See below for details see Jan Newslink. |
| Oct 25-26 |
BROM.SOC.NSW SPRING SHOW 9-11 Wellbank St Concord |
| Dec 7 |
HILLS DISTRICT ORCHID OPEN DAY. 183 Windsor Rd Northmead, Email: davidpbanks@veritel.com.au or (02) 9674-4720 |
| April 10-13(2009) |
BROMADELAIDE2009 Brom. Conference. |
| May 16-17(2009) |
BROM.SOC.AUSTRALIA AUTUMN SHOW Burwood RSL |
| Oct 10-11(2009) |
BROM.SOC.AUSTRALIA SPRING SHOW Burwood RSL |
UPCOMING TOPICS:
- May 3, 2008: Billbergias.
- June 7, 2008: Laurie Dorfer: Tillandsias Up Close.
- July 5, 2008: Christmas in July.
PLANT RESULTS - February 2nd, 2008
OPEN
| 1st | Catherine Wainwright |
xNeophytum Galactic Warrior |
| 2nd | Neville Wood |
Vriesea Splenriet |
| 3rd | Neville Wood |
Neoregelia Inferno |
Novice
| 1st | Rhonda Patterson |
Neoregelia concentrica hybrid – Colony |
| 2nd | Rhonda Patterson |
Vriesea saundersii |
| 3rd | Rhonda Patterson |
Neoregelia Red All Over (Unregistered as such!) |
TILLANDSIA
| 1st | Dick Jamieson |
Tillandsia streptophylla |
| 2nd | Catherine Wainwright |
Tillandsia leiboldiana |
| 3rd | Dick Jamieson |
Tillandsia Creation |
PLANT RESULTS - March 1st, 2008
OPEN
| 1st | Neville Wood |
Billbergia Hallelujah |
| 2nd | Dick Jamieson |
Catopsis berteroniana |
| 3rd | Neville Wood |
Vriesea Angela |
NOVICE
| 1st | Brian Baldwin |
Billbergia species |
| 2nd | Lucas Morgan |
Nidularium Ruby Lee |
| 3rd | Rhonda Patterson |
xNeophytum Galactic Warrior |
TILLANDSIA
| 1st | Muriel Baldwin |
Group of tillandsias mounted on wood |
| 2nd | Dick Jamieson |
Tillandsia argentina |
| 3rd | Graham Bevan |
Tillandsia lindenii |
AN UPDATE ON THE TILLANDSIA IONANTHA ARTICLE - JANUARY 2008 NEWSLINK:
Chris Larson, a tillandsia expert and editor of the Bromeliad Society of Victoria’s newsletter, has kindly sent me this update on Tillandsia ionantha and its cultivars:
“The cultivar T. Huamelula is a variety of T. ionantha from Mexico, which was later changed to become T. ionantha var. maxima. This plant is commonly in collections in Australia under the name T. Huamelula or (less commonly) T. ionantha 'Monster'. Those of you that have it should change the label. Another large form of T. ionantha from Guatemala goes under the name T. ionantha 'Penito' (this is common in Australia) or as Derek would call it T. Penito.”
SOME NOTES ON PLANTS BROUGHT TO OUR FEBRUARY/MARCH 2008 MEETINGS:
Aechmea Fia: This was a very lovely aechmea brought in to our February meeting by Bruce Cluff who had picked it up at the Plant Collectors’ Fair at Bilpin. It is a hybrid made by Deroose around 1990 with seed parent A. fulgens var. discolor and pollen parent A. chantinii. It is apparently a very popular house plant in Europe and there are two forms in cultivation(?)—one all green and the other with discolored leaves. Tropiflora said of the discolor form, “A spectacular bloomer with a showy panicle of very long-lasting orange-red berries and bright bracts. The growth is upright in a graceful urn shape with discolor foliage—green above and deep wine-red below”—which described Bruce’s plant very well.
Tillandsia argentina: Dick Jamieson brought this tillandsia to our March meeting and I can’t remember having seen it on our tables before. As the name implies, this tillandsia comes from [north-western] Argentina where it is found growing as an epiphyte on trees and shrubs (often along with T. tenuifolia) and on rocks at elevations of 400-1600 m. It is usually found in large clumps with the individual specimens growing together so densely that it can be difficult to tell where one plant ends and the other begins. The bloom is splendid—the floral bracts are wine red, and the flower petals, which flare and recurve, are rose pink. In contrast with the olive-green foliage, the effect is quite striking.
T. argentina is slow growing, taking years to form a large clump, so that some collectors have been known to buy three or four of this species at a time, grouping them together to create the appearance of a clump. It is easy to cultivate outdoors and prefers medium to bright light. This is a hardy plant because it grows in a wide range of conditions in its natural habitat. When T. argentina does grow as a clump, care must be taken to provide sufficient air circulation to allow the inner parts of the clump adequate opportunity to dry after watering, as staying wet for any length of time could cause the leaves, or even the entire plant to suffocate and die.
(www.rainforestflora.com/species/argentina.htm & www.teasnursery.com/page11.html)
Tillandsia Creation: Always a stunner, and Dick’s beautiful plant brought to our February meeting was no exception. It was created by the Corn. Bak Nursery of Holland in 1985 and Tropiflora’s Cargo Report of June 2006 says it all: “Hybridizer’s magic, using T. cyanea, with deep--pink paddles and fragrant purple flowers, and T. platyrhachis, a large and dramatic species with deep-lavender branches. The results are startling and spectacular. ‘Creation’ approaches perfection. A large grower with narrow, greenish-red, slightly striated leaves forming a very leafy rosette over 24 inches across and a massive, spectacular inflorescence of multiple, paddle-shaped branches of bright pink with lovely purple, fragrant flowers.”
While T. cyanea — one of the crosses — prefers to be left to clump up, T. Creation does better when grown as a single specimen with intensive feeding and good air circulation.
Tillandsia lindenii: Graham’s lovely plant, brought to our March meeting, is a T. cyanea look-alike, along with T. anceps, T. pretiosa, and T. umbellata, all having the pink paddle-shaped inflorescence with over-sized deep blue, fragrant flowers (which remind me of our native Patersonia) which open sequentially along the rim. Apparently the main difference between T. lindenii, T. umbellata, and T. pretiosa is in the surface structure of the floral bracts.
T. pretiosa and T. umbellata seem to be quite rare, coming only from a few specific localities in Ecuador, while T. lindenii comes from northern Peru as well as Ecuador. It was discovered in 1868 and it is said that the plants with longer flower stems come from Peru, those with shorter stems from Ecuador.
Comparing T. lindenii with T. cyanea, T. lindenii is more cold tolerant than T. cyanea. While both species come from Ecuador, T. lindenii grows epiphytically at around 1200 m in Andean forests which have cool nights. The flower head is also much longer, narrower and paler than T. cyanea, being a pale grey-blue in colour, and the foliage has a more reddish hue, with broader leaves.
WHAT’S IN A NAME ?
By Phillip Robinson, Illawarra Bromeliad Society
We use names to describe the objects around us. Plants are an important part of our environment whether they be used for food, medicine, clothing, tools, or for decorative purposes. Common names were given to plants that were of significance to the people who were in contact with them. Common names are used for plants in most cultures in a similar form consisting of two words: one for the class of plant, the other to distinguish the type if necessary. Take the pineapple as an example, where we have the common pineapple (Ananas comosus) and the dwarf pineapple (Ananas nanus).
Many of us would like to use common names rather than the Botanical Code which uses names that we find difficult to pronounce let alone spell. Why then do we not use common names?
Problems with Using Common Names
1. The same plant may have different common names—e.g., Tillandsia usneoides is known both as Spanish Moss and as Old Man’s Beard.
2. The same common name may apply to different plants:
. i. Lobster Claws is a common name for three different plants. It applies to Vriesea carinata and to heliconia species because of the colours and shape of the inflorescence. It also is the common name for Cheirodopsis pillansii (a succulent pigface-type plant) because of the shape of the leaves.
. ii. Earth Star is the common name for Cryptanthus acaulis and some other cryptanthus species as well as for fungi in the puffball group.
. iii. Crimson Cup is often used for members of Neoregelia where the centre turns red at flowering time.
3. The common name for a particular plant may change over time as a more favourable one emerges. This happens in the Nursery Trade when catchy names are invented to boost sales.
The use of common names will continue because many are romantic or appealing—e.g., Queen’s Tears for Billbergia nutans and Grecian Vase for Quesnelia marmorata. However, there is a lack of precision in the use of common names.
It was long ago recognised that a more accurate naming system was needed so that each plant species could be distinguished from all others.
Why is Latin used as the language for naming plants when this language is no longer spoken? Latin was the internationally accepted language when the first printed books were circulated. By the 18th century, plant descriptions were short descriptions in Latin.
In 1753 Linnaeus began his two name system for each plant and this has evolved to the present Code where the first name represents the Genus, followed by the Species name.
The Botanical Code
1. Plant and animal names are independent (so that the same scientific name could apply both to an animal and to a plant).
2. Plant names are based on Type Specimens (usually a dried specimen of that plant which acts as the reference for that species).
3. The plant name is based on the first date for publication of that species.
4. Each plant (or group of plants) can have only one correct name—i.e., the earliest one that followed the rules.
5. Scientific names are to be treated as Latin.
Example 1: The genus Quesnelia was named after Quesnel (a French Consul).
Example 2: The genus Billbergia was named after Billberg (a Swedish botanist; the species Billbergia sanderiana was named after Sander (an English horticulturist).
6. All of the above rules are retrospective.
The Code requires that each species has a Type Specimen (usually the original specimen first collected) which is described in Latin according to strict rules and that this description be published.
Why Do the Names of Plants Change?
While we all find name changes to be frustrating, and many of us feel the changes to be unnecessary, there are valid reasons for change:
1. In order to conform with the rules of the Botanical Code—The earliest valid name must replace the other name(s).
2. When a revision of the plant group occurs which may lead either to further divisions of the group or to combinations within the group. Examples would be:
. The genus Canistropsis was set up after revision of the Nidularium Complex.
. The genus Streptocalyx was dismantled after revision and most of its species were transferred to the genus Aechmea.
3. To correct a misidentification or a misapplied name:
. Botanists are not popular when the name of a plant is changed after many years of use by the public. The frustration is even greater when the name of a plant is changed back to a previously used name.
Bromeliad nursery owners, members of bromeliad societies and members of the public use well known names to buy, sell and exchange plants. There is little interest overall in unknown names so that there is no incentive to keep names up to date.
In the 19th century, botanists from various countries were describing new plants discovered in the European colonial expansion of new lands (often the countries were at war). This led to the same species being given different names and to different species being given the same name. The Botanical Code was used to restore order to this chaos. The earliest published description must have that name take precedence. When a name changes, the formerly used name is referred to as a synonym.
Examples of Name Changes
1. The plant now known as Quesnelia quesneliana was first described by A. Brogniart in 1841 as Billbergia quesneliana. C. Gaudichaud in 1842 described it as Quesnelia rufa. It was given the name Quesnelia cayennensis in 1889 by C. Baker. E. Morren described it as Quesnelia skinneri in 1930. By applying the Botanical Code, the plant was known as Billbergia quesneliana because this was the earliest published description.
In 1952, L. B. Smith revised the group, transferring the plant to the genus Quesnelia from the genus Billbergia. The plant is now known as Quesnelia quesneliana.
2. The plant now known as Canistropsis billbergioides has been the subject of various name changes, having initially been described as Tillandsia terminalis by Vellozo in 1825 and changed to Hohenbergia billbergioides in 1830 by the son of R. Schultes. In 1879 it was described as Tillandsia citrina by W. Burchell and in 1889 C. Baker named it Aechmea billbergioides. It was described as Nidularium parviflorum by C. Lindman in 1891 and also in 1891 as Nidularium bracteatum by C. Mez, who, in 1921, then renamed it Nidularium citrinum. In 1931 L.B. Smith described it as Nidularium billbergioides, by which name it was known until quite recently, when Leme revised this group. He placed it in the new genus Canistropsis and it now becomes Canistropsis billbergioides.
Can Botanical Names Help the General Public or Are They the Preserve of Botanists?
Many botanical names are named after people and these convey nothing about the plant but other names can be useful. For example, the species may be named after the place where the plant was found to be growing and this information may help with the conditions required for it to grow successfully.
Examples of locality names:
1. Portea petropolitana named after Petropolis near Rio de Janeiro in Brazil.
2. Vriesea corcovadensis named after Corcovada Mountain near Rio de Janeiro.
3. Aechmea organensis named after the Organ Mountains of southern Brazil near Rio de Janeiro.
The above three examples are easy to grow coming from similar climatic conditions to those along the east coast of Australia.
4. Cryptanthus bahianus after the State of Bahia in Brazil. This species requires full sun and drier conditions than other species of cryptanthus, which reflects its native range.
5. Aechmea servitensis is named after Servita on the eastern side of the Andes in Colombia which is a more tropical area than our region. However, if given warm, sheltered conditions it will succeed here.
6. Tillandsia vicentina, named after the de San Vicente Volcano in San Salvador in Central America, grows in the cooler mountainous area of a tropical country so it will succeed in our climate.
Examples of Growth Form Names: (The name giving information about the appearance of the plant.)
1. The genus Nidularium was so named because of the resemblance of the inflorescence to a little bird’s nest with eggs.
2. Neoregelia ampullacea named because the rosettes resemble an ampulla (Roman vessel).
3. Tillandsia caput-medusae named because of the resemblance of the plant to the head of Medusa.
4. Tillandsia bulbosa named because of the bulbous swelling at the base of the plant.
5. Tillandsia plumosa named because the leaves have long scales, giving the appearance of feathers or plumes.
6. Guzmania lingulata var minor named because this variety is smaller than the normal species.
7. Tillandsia pauciflora and Neoregelia pauciflora named because there are few flowers in the inflorescence.
8. Pitcairnia heterophylla named because there are two types of leaves—short spike-like brown leaves near the base and normal green foliage leaves.
9. Fosterella penduliflora named because the flowers are hanging downwards.
10. Billbergia nutans named because the inflorescence is nodding.
Names Based on the Plant Resembling a Different Genus:
1. Hechtia tillandsioides - resembling a tillandsia, having smooth leaves rather than a spiny edge as in other species of Hechtia.
2. Canistropsis billbergioides – because the inflorescence is supposedly like that of a billbergia.
3. Aechmea bromeliifolia because the fiercely-armed leaves resemble those of a bromelia.
4. Fascicularia pitcairnifolia because the leaves are like those of a pitcairnia.
Names Based on the Shape and Appearance of the Leaf:
1. Deuterocohnia brevifolia named because the leaves are short.
2. Neoregelia augustifolia named because of the narrow leaves.
3. Tillandsia juncea named because the leaves resemble those of the rush (Juncus).
4. Tillandsia latifolia named because the leaves are wider than in most tillandsia species.
Names Based on Colours: (These names give information about the colour but not always about the plant part under description.)
1. Tillandsia cyanea and Neoregelia cyanea named because of the blue flowers.
2. Tillandsia ionantha named because of the violet flowers.
3. Tillandsia crocata named because of the saffron-yellow flowers.
4. Tillandsia caerulea named because of the sky-blue flowers.
5. Vriesea flammea named because of the bright red floral bracts.
6. Vriesea chrysostachys named because of the gold or yellow spiked inflorescence.
7. Vriesea psittacina named because of the colour of the inflorescence resembling the plumage of a parrot.
8. Vriesea erythrodactylon named for the red finger-like floral bracts.
9. Guzmania sanguinea named for the blood-red colour of the lower part of the inner rosette leaves at flowering time.
10. Tillandsia argentea named for the white or silver colour of the leaves.
11. Nidularium purpureum named for the grape-purple colour of the leaves.
12. Pitcairnia xanthocalyx named for the yellow inflorescence.
Examples of Names Based on Conspicuous Markings or Features: (These names give useful information about the plant, but it is not always clear as to the part of the plant being described.)
1. Vriesea hieroglyphica named for the leaf markings resembling hieroglyphics (ancient handwriting)
2. Quesnelia marmorata and Neoregelia marmorata named because of the marbling or blotching on the leaves.
3. Vriesea guttata named because of the spotted leaves.
4. Aechmea fasciata named because of the banded markings (fasciations) on the leaves.
5. Aechmea miniata var. discolor named because in this variety the upper and lower surfaces of the leaves are different colours—upper is green, lower is reddish-purple.
6. Billbergia pyramidalis var. concolor named because the petals in this variety are all red and not edged with violet as in the species.
7. Cryptanthus bivittatus named because the leaf has two yellowish stripes extending lengthwise.
8. Cryptanthus zonatus named because of the zones or bands on its leaves.
9. Tillandsia vernicosa named because of the shiny red inflorescence bracts which appear to have been varnished.
10. Tillandsia tricolor named because of the three colours in the inflorescence.
There are, of course, species names that say it all—such as Vriesea splendens and Alcantarea imperialis. These two plants merit the specific names used to describe them.
References
Padilla, Victoria (1973) Bromeliads (New York, Crown Publishers)
Rauh, Werner (1979) The Bromeliad Lexicon. Peter Temple, Editor (London, Blandford Press)
Spencer, Roger, Cross, Rob and Lumley, Peter (2007) Plant Names: A Guide to Botanical Nomenclature Third Edition (Collingwood: CSIRO Publishing)
BROMADELAIDE2009
The Fifteenth Australasian Bromeliad Conference - www.bromeliad.org.au/BROMADELAIDE2009.htm
To be known as: BROMADELAIDE - Easter 2009 - Friday 10 April – Monday 13 April
Registration: Very early bird (when paid before 31/7/2008) - $170
Adelaide Meridien special room rate: $125/night per room – Password: Bromadelaide2009
Toll Free 1800 888 228 or email res@adelaidemeridien.com.au
See Eileen for brochures. |
HOW I STARTED IN BROMELIADS
(By Neville Wood, Illawarra Bromeliad Society, 2008)
I guess my first connection with bromeliads or “bromel-aids” as they were then commonly called, was about 1969 at which time I was growing orchids. A good friend, who like me lived in Shellharbour and also grew orchids, was growing some of the more common bromeliads at that time. He had these attached to pieces of wood which were wall mounted and hung randomly throughout his shade house as an embellishment to his orchids. From what I recall they were mostly Aechmeas including fasciata, orlandiana, weilbachii and Foster’s Favourite and, I must admit, looked most attractive growing on their pieces of wood draped with “Old Man’s Beard” and looking as though they had just been taken from the jungle.
I was particularly interested when my friend explained that the unusual aspect of them was that they always had a supply of water in the central vase and this would sustain them as it mixed with the rotting debris and dead insects and acted as a fertilizer. At that time it was also customary to occasionally add about a teaspoon of vinegar to the central vase which was believed to make them grow better (I have never tried this so I don’t know if it works).
When my friend saw that I was interested in them he gave me a pup off an A. fasciata plant which at that time he called ‘Silver King’. This was where it all started for me and I took the pup home and planted it in my shade house where it grew and multiplied over the following years. I used these plants together with ferns as complementary plants in my orchid displays at the annual orchid show at Nowra for quite a few years, but at that time although the broms were interesting, my main hobby was still orchids.
As the years passed a new hobby began and I swapped my orchid collection for birds (finches) but all the time there was still a small corner of my old shade house left which still housed a few ferns and what was left of the original A. fasciata.
Fast forward to about 1998 when I had given up the birds due to shiftwork commitments and had decided to try my hand at growing ferns. I began to renew the framework of my old shade house to make it look a bit more respectable and as I pulled down old benches and shade-cloth, there, still growing in the corner having been neglected and forgotten for many years, were some A. fasciata plants. These were from the original pups I had started with so many years ago. It was at this point I decided that if these could survive all this time without any special attention, the direction my new hobby would take would be bromeliads, not ferns as I had first planned, and this is how I started in bromeliads.
RECYCLING (PART 1) :
By Neville Wood, Illawarra Bromeliad Society, 2008.
There has been a lot of publicity about recycling during the past few years; however it’s not something new and in fact I still have memories of it being used extensively when I was a child during the hard years just before and after the end of the Second World War. From this period a lot of lessons were learnt about being thrifty and making the best use of what you had, because as well as money being in short supply, so was the availability of many common everyday items which we take for granted today and, due to this, everyone learnt to improvise.
Fast forward to 2008 and we are still improvising and bromeliad growers are doing it as well to assist in keeping down expenditure while indulging in their favourite hobby of growing broms.
The object of this article is to pass on some ideas I use, as well as those of other people, which I have observed during the last few years since I caught “Bromelitis” after being bitten by the notorious “Bromeliad Bug”.
Improvisation usually starts when you need something you haven’t got and you need to think up an alternative way of doing something or finding a use for something which you have put aside as it might someday “come in handy”.
- Suspending Plants: We probably all have used plastic pot hangers to suspend our plants from trees or overhead timbers at some time and likewise have found they don’t always hang at the right level or there is no convenient hook or nail to hang them from. A simple way to adjust the height is to loop a 30mm wide scrap strip of shade-cloth over the tree branch or beam and tie the two ends together at the desired length. Place the knot at the top where it’s less visible and just hook the pot hanger onto the bottom of the loop. The weight of the pot will pull the strip down into a uniform tidy shape and it is very strong and will last for years.
Another method often used to lower a group of hanging plants to the same level is to either make wire hooks of the required length or to use the common wire coat hanger. Simply by holding the centre of the base in one hand and the hook in the other, stretch the coat hanger and you finish up with a hook on one end to hang over the overhead object and a loop at the bottom on which to hook your pot hanger. As these are usually made from galvanised wire they are also long lasting.
- Polystyrene: Long looked on as the scourge of the environment as it doesn’t break down, why not make it into a useful item instead of something you put in the garbage bin? I have found it has many uses in the growing of bromeliads. By breaking off 10-15mm “chunks” and putting them in the bottom of pots you achieve two benefits: firstly it assists in drainage, and secondly it creates air pockets in an area which generally remains wet or at the least very damp. The roots seem to find it attractive as they are often found growing between and onto these chunks when the plant is re-potted. I also break it into small granules of 3-5mm size and use it in my potting mix as I find it very good for opening the mix up and creating minute air pockets which also aids in free drainage.
I use the polystyrene broccoli boxes and cut them down to about 75mm in height, put about 25mm of coco peat in the bottom and place my small seedling tubes on top. I find this is a convenient way of housing them as they don’t fall over and the roots quickly find their way down into the coco peat on the bottom which seems to encourage more vigorous growth.
They can also be used as planter boxes by making a few holes in the bottom, painting them with an *acrylic paint of your preferred colour and planting them with flowers or herbs.
*It must be a water-based paint because a paint containing any type of solvent will eat into the polystyrene and dissolve it.
These types of boxes can also be used on greenhouse benches to create a tiered effect to better display your plants and they can be painted an unobtrusive colour to blend into the background or left white to reflect extra light. I have even seen different growers using them instead of benches by simply tipping them upside down and positioning them in a straight and level line. They are cheap (about $1.00 each), don’t rot, are amazingly strong and will easily support the weight of potted plants.
They are also very handy when you want to transport an awkward size plant to a meeting or a show without causing any damage. Simply turn the box upside down and cut a hole slightly larger than the diameter of the base of the pot but smaller than the diameter of the top. Insert the pot into the hole so that it goes in about half of its depth and you will find the polystyrene will grip the sides of the pot and hold it firmly in place with the leaves clear of any other obstacles which could cause damage.
WEAR YOUR GLASSES
By Neville Wood, Illawarra Bromeliad Society, 2008.
Ever since I started growing bromeliads about four years back I have been constantly told by other growers that these plants don’t like much fertilizer; in fact a lot of growers say not to fertilize them at all. After reading numerous articles by growers from other states, as well as other countries, I now realise there are a lot of growers who do fertilize their plants and with good results; so being keen to grow better and better plants I decided to try using fertilizer on some of my plants and make up my own mind.
While reading all I could about the most suitable type of fertilizer to use I soon found that every grower has a favourite type, just like they have a favourite type of potting mix. However, the one common denominator that seemed evident from my research was that almost everyone agreed the fertilizer should have a low Nitrogen (N) content, preferably below 6.0%, a Phosphorus (P) content around about 4%-5% and a reasonably high Potassium (K) content of 10% - 12%.
After deciding I would use a slow release fertilizer I began to search the shelves of nurseries and garden centres but all the slow release fertilizers I looked at had a Nitrogen content of 15% - 16% until I finally found an Osmocote with what appeared to be a ratio of N 5.0%, P 4.4% and K 10.0%. Success at last I thought, so I purchased a couple of 500g containers and headed home to begin re-potting a swag of neoregelia pups.
Before I started, I read the directions carefully which stated, “Simply mix the Osmocote into the soil around your pot plants and water thoroughly and for best results re-apply every six months.” As for the quantity to use, it was stated that, as a guide, to use a 20ml tablespoon as a measure and sprinkle half a tablespoon (10ml) per 15cm pot. As I was only using 10cm pots I decided I would play it safe and only use a level 5ml measure to each pot, and so I began. When the potting mix was about 25mm from the top of the pot I sprinkled the Osmocote all around the surface and then covered it over with more mix until it reached just below the rim of the pot, which I surmised would help prevent it from being washed out of the pot when I was watering. I finally finished my re-potting, gave the plants a good watering and thought no more about it.
After four or five weeks I noticed obvious growth taking place which seemed to get faster and faster as the weeks went on. After about four months, the plants which originally had plenty of space between them on the bench were now growing quite fast and almost touching each other. But something didn’t seem quite right, because as well as spreading out they were also growing much taller than the mother plants had and the leaves were more strappy and didn’t show the colour they should have at that stage. As they continued to grow taller and thinner I decided to once more check the label on the Osmocote container.
The first container I picked up was the one I hadn’t at that stage opened and as I checked the N:P:K ratio I was taken aback to find the “N” content was clearly shown as 15% not the 5% I thought I had seen on the other container. I immediately got the other container to compare the two and read the “N” content on the container again as 5%. However when I examined it more closely, with my glasses on this time, there was a smudge in front of the 5 indicating something had been on the label, and when it was removed it had also removed the 1 from in front of the 5. All the other text on the labels was identical and it was now obvious that the Osmocote I had been using did in fact have a 15% Nitrogen content not 5% as I had first thought. The obvious reason for the growth spurt on all of the pups was clearly an overdose of Nitrogen.
By this time almost five months had passed and as the instructions stated to re-apply each six months, I assumed the fertilizer was almost at the end of its useful life so I didn’t see any point in re-potting all of the plants again into a fertilizer-free mix so I just let them be. Unfortunately two months later they were still growing strongly and were now almost 15cm taller than the mother plants. As if that wasn’t enough, they had much narrower leaves, were lacking in colour and were now very overcrowded on the bench.
I guess there is a very good lesson here for me or anyone like me who wears glasses for reading: Don’t kid yourself you can get away with reading the small print without your glasses, not even the couple of lines of the N:P:K ratio as it can have serious consequences!
When friends comment on how tall and skinny those pups have grown I just tell them, “I was short on space so I fertilised them to make them grow up rather than out so I could fit more on the bench!”
FLYSPECK SCALE
Or - If You Have Little Black Balls You Have Problems
By Maureen (Bugsie) Johns – Bromeliad Society of NSW
Flyspeck scale should no longer be thought of as a pest confined to only tropical areas. I have seen a few pioneers on bromeliads at the last Illawarra Bromeliad Society show. A heavy infestation of flyspeck scale can be unsightly (resembling coarse sandpaper in serious cases), can suck the nourishment from the host plant, and can spread plant diseases. As flyspeck scale is an ARMOURED scale, it can be very difficult to kill so we do not want it to establish itself in your collection.
Flyspeck Scale Has Spread Quickly In Australia
‘Pineapple Pests and Disorders’ (a comprehensive book published by the Queensland Department of Primary Industries in 1993) makes no mention at all of flyspeck scale. I am assuming that if flyspeck scale was then unknown in commercial pineapple crops, and to the various researchers who contributed to the book. that it was not on bromeliads in Australia either. Some flyspeck scale managed to survive our Australian quarantine system on imported orchids or bromeliads. Unfortunately, their natural predators appear not to have survived the lethal sprays, dips or gases used before shipping and in quarantine.
Flyspeck Scale Is No Longer Just a Tropical Problem
In the Americas, flyspeck scale survives only in tropical areas or hothouses. The flyspeck scale which emigrated to Australia seem to have adapted rather well to our climate. At first, there was some talk about flyspeck scale in the tropical areas of Queensland. A few years ago, people spoke in hushed whispers about flyspeck scale being in a nursery on the north coast of NSW. Here in Sydney, now, I have seen flyspeck scale surviving bad frosts, outdoors!
How To Recognise Your Enemy
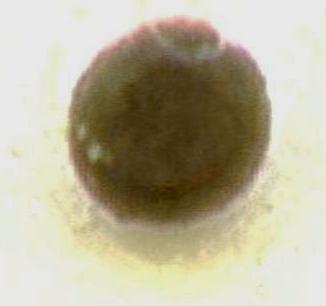
Four to five average sized female flyspeck scale could fit on the head of an ordinary pin. They are tiny little black balls about the size and shape of a large poppy seed, so reading glasses may be necessary at first. There are three flyspeck scale in the following slightly enlarged picture. One is dead and slightly squashed by the scanner. YOU may only have one pioneer on your newly purchased plant. Look carefully!
Flyspeck scale will often sit right out in plain sight on the tops of the leaves, on the rims of the pot or tray, on a plant tag or label or even on a nearby wall. They can even be found on the grey-leafed tillandsias.
Look for a tiny black spot. If you rub a finger gently over the spot and feel that the spot is raised, ball shaped and adheres quite strongly to the leaf, you have found flyspeck scale. I won’t rub or flick her off, as I may spread her eggs. I prefer to remove her with a cotton bud just moistened with my tongue, then drop bug and cotton bud straight away into a plastic pill bottle that has some methylated spirits in the bottom.
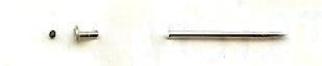
Flyspeck scale (found on a plastic tag) with pin inserted for comparison, about 2x actual size.
Know Your Enemy
The flyspeck scale you can see is the adult female. She will have been quite mobile in her youth, so don’t only look on neighbouring plants for her sisters. Look metres away too.
By the time you notice her, she has formed a hard, brittle, protective armour of wax and cast skin. This armour protects her from contact insecticides and the weather.
With a mother only 0.8 to 1.25 mm in diameter, you can imagine how small her eggs are (hidden under her body). The mother may already be dead, after laying her eggs, but she still adheres tightly to the plant, protecting her eggs.
Lifecycle Of Scale Insects
Most scale insects remain close to where they are hatched. An infested plant is usually quite noticeable, especially if you pull older lower leaves away from the plant, long before the scale insects spread to other plants. The young larvae, colloquially called ‘crawlers’, have legs which are eventually lost as they go through various stages and moults, but the way that flyspeck scale spreads tempts me to call them ‘leapfroggers’. Scale insects can be quite mobile in their youth. All have legs. Some have wings. All are ready to hitchhike on air currents, clothing or hands. I call this the ‘mobile dandruff’ stage.
The young and the adult females feed by poking their syringe-like mouthparts into the plant and sucking out the juice. From egg to the adult female laying eggs may take under a fortnight under suitable conditions. Generations will tend to overlap so not all of the insects will be vulnerable to a particular method of control at the same time. Adult males do not eat and will be much smaller and differently shaped. They could even have wings. I have not managed to get a picture of adult flyspeck scale mating. I think this will be difficult as they must mate quickly before they die. I was lucky enough to get a good picture of pineapple scale mating, for later publication.
Insecticides Are Like Penicillin
If you do not use the full dosage and repeat it at the correct intervals according to instructions, some stronger bugs will survive to breed and pass on their stronger genes. Read the instructions! In the case of flyspeck scale, I prefer using the stronger dosage recommended for mealy bug, repeating it an extra time for good measure. If you have used the same method of control three or four times in a row and the insects are still a problem they could be resistant to that method so change to another method. Be vigilant! You may think you have won the battle but some survivors may be breeding unnoticed until a large population makes itself noticed in the peak late summer through to early winter time.
How To Prevent The Spread Of Flyspeck Scale:
- EXAMINE all new plants thoroughly. Even if you don’t see any scale you could consider giving them a thorough wash with Ľ strength Clensel or even washing up liquid before taking them home. A spray of your insecticide of choice may also be appropriate. The plants may only have been given a quick wipe over before being sold to you and could have microscopic eggs or larvae deep in the leaf axils. Be aware that if sprayed, or even thoroughly scrubbed, your new plants will be vulnerable to sunlight.
- Do You Want That Buggy Plant?
Any obvious flyspeck scale are only the adult females. The rest of the population are microscopic and could be well hidden. If a plant has been wiped down before sale, look for small spots of lighter colour where the insects have been feeding. You may be told that the scale are dead. In this case, remove one insect, place it on top of one thumb nail, turn the other thumb upside down and flatten the insect between both nails. Dead scale will be dry and powdery. If there are enough dead flyspeck scale to be obvious, be wary of a possible surviving breeding population.
- QUARANTINE all new plants.
I would not consider six months to be excessive. Keep your new plants as far away from your own as possible and do not touch or brush against them before visiting your own. I visited the shadehouse of a New South Wales Bromeliad Society member two years ago and I saw no sign of flyspeck scale EXCEPT on a newly acquired bromeliad from Queensland--unfortunately in the same shadehouse, though about a metre from other plants. At the last New South Wales show, at least 80% of this member’s plants were rejected and removed by the president of the society for having flyspeck scale.
- Help Other People Recognise Flyspeck Scale
- - Be diplomatic. This is a relatively new bug in Australia. They might think that the scale are caterpillar eggs (everyone likes butterflies). Some bromeliads entered in the Royal Show, sitting right next to mine had flyspeck scale, which even the judges had not noticed.
- - Make up a fun recognition kit. Glue poppy seeds to a leaf or paper, to a label, a pot edge, or a tray, even to mesh shelving. Spray them with varnish to look shiny if you like. Look at them in various lighting and angles. Discuss the almost perfect ball shape. Buy cheap reading glasses from a discount shop if necessary. If you cannot feel the raised convex shape of the poppy seed, lick your finger and you will find it to be more sensitive.
In conclusion, SPREAD THE WORD, NOT FLYSPECK SCALE!
For the next issue I hope to write about various methods of combating flyspeck scale.
SEARCHING FOR MISS FORTUNA:
An intriguing novel inspired by true events is a bizarre adventure laced with offbeat humour, odd characters, and vivid descriptions, chronicling an obsession with collecting a rare plant.
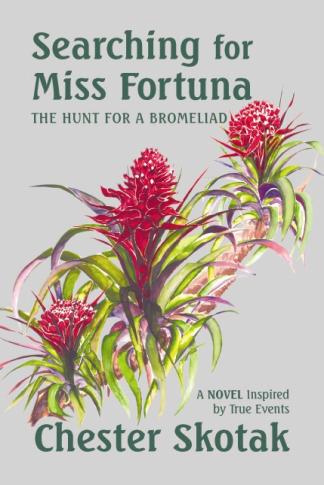 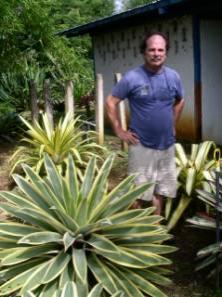
Book Cover - - - Chester Skotak and Rare Variegated Alcantareas
Chester Skotak is a world-renowned bromeliad hybridizer with his fascination with bromeliads going back over 33 years. Variegated plants are his favourites, having an extensive collection of rare and one-of-a-kind specimens in his private collection. His creative talents have made him a leading expert in the field of bromeliad hybridization and he was the first to produce variegated neoregelia hybrids from seed. Chester is a pioneer in producing spineless aechmea hybrids. He also figured out how to create unheard of complex guzmania hybrids which are radically different from current mainstream offerings. For the past thirteen years, Chester has been working with pineapples: his miniature spineless pineapples are unique and receive rave reviews from everyone who sees them. He has led plant-collecting expeditions throughout Central and South America and has introduced countless unusual bromeliad hybrids into horticulture.* Two bromeliads have been named in his honour: Guzmania skotakii (Costa Rica) and Aechmea skotakii (Ecuador) and a Costa Rican tree species (Palicourea skotakii) bears his name.”
(Extracted from Welcome to Chester Skotak’s Colorful World, )
(* Australian bromeliad enthusiasts would be familiar with: Neoregelia ‘Garnish’; ‘Yin’; ‘Yang’; Hannibal Lector’; ‘Mauve Star’; ‘Predator’; ‘Predatress’; ’Blast’; ‘Gunpowder’; and ‘Bevvie’, ‘Bevvie Bee’ and ‘Tess’.)
One reviewer (J.B. from Texas) writes: ‘SEARCHING FOR MISS FORTUNA’ uproots the narrator from Texas and moves through moneyed South Florida into the steamy, wild forests of Panama and Costa Rica. This is an amazing adventure story of obsession and greed with characters that jump out of the pages and pull you into all kinds of weirdness. Anyone interested in strange rainforest tales should not miss this one!” |
Click HERE to return to Illawarra Bromeliad Society "Club News Page".
Updated 09/05/08